What Is Jewelry Equipment Used For?
Jewelry Equipment turns design into finished work. It includes bench tools, rolling mills, polishing machines, casting systems, microscopes, and measuring instruments. A jeweler may use a loupe to inspect a setting, then a flex-shaft to refine its edges. Each tool serves a practical purpose: shaping metal, joining components, setting stones, or checking quality. The right equipment can improve precision and repeatability. It cannot replace sound judgment or skilled hands.
The scale of jewelry production gives this equipment context. The World Gold Council’s Gold Demand Trends: Full Year 2023 report recorded 2,093.1 tonnes of global gold jewelry demand that year. That figure measures jewelry demand, not equipment sales, so it should not be mistaken for a machinery-market estimate. Still, it helps explain why reliable production tools matter across workshops and factories. Metalsmith and author Charles Lewton-Brain is a recognized educator in jewelry fabrication. I could not verify a direct quotation from him about equipment, so I will not invent one; his published teaching emphasizes understanding processes and using tools thoughtfully. A useful paraphrase is: choose equipment for the operation, not for appearance. That distinction is easy to overlook. A costly machine may sit idle if it does not match the maker’s materials, workflow, or production volume. The sections ahead explain what Jewelry Equipment is used for, how key tool groups support different tasks, and what to consider when selecting equipment. Small details matter. A stable bench, sharp bur, or well-maintained polishing wheel can change the finish—and the time required to achieve it.
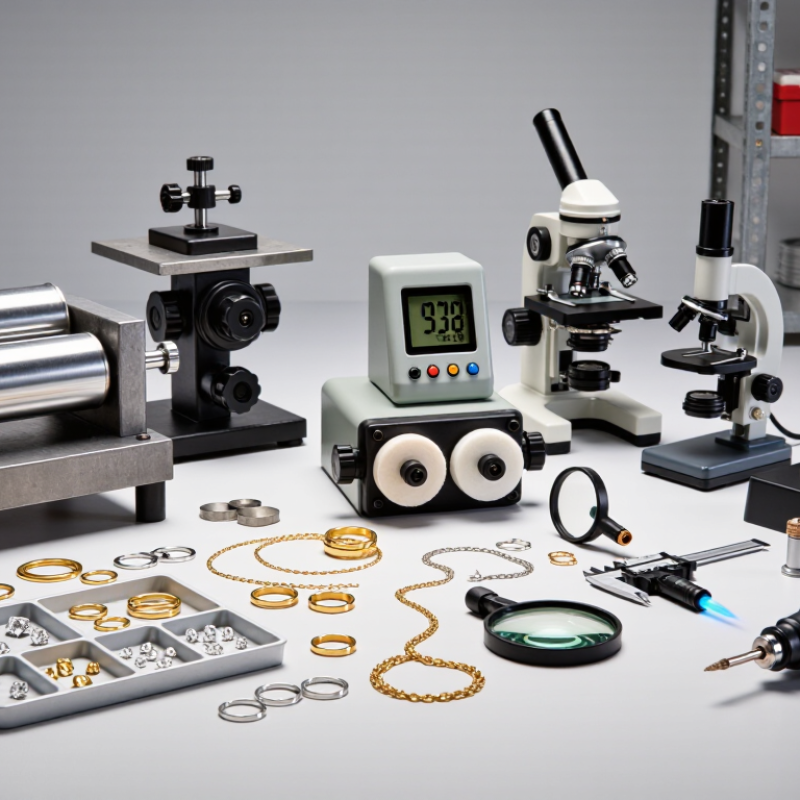
What Jewelry Equipment Covers: Design, Fabrication, Setting, and Inspection
What Is Jewelry Equipment Used For?
What Jewelry Equipment Covers: Design, Fabrication, Setting, and Inspection
Jewelry equipment supports each stage of making a piece, from the first sketch to the final check. Design tools include calipers, dividers, and modeling materials for testing proportions. A paper drawing may look balanced, yet feel awkward when worn. Small adjustments matter. For fabrication, jewelers use saw frames, files, pliers, and soldering tools to shape and join metal. A fine saw blade can cut a narrow curve, while a flat file helps smooth its edge. Good lighting and a stable work surface also make precise work easier.
Setting tools help position stones securely. Tweezers, setting burs, and hand tools allow careful adjustments around a stone’s seat and prongs. Pressure should be controlled; forcing a setting can damage the stone or distort the metal. Inspection equipment, such as a loupe, microscope, and measuring gauge, helps reveal uneven prongs, rough edges, or loose stones. Check from more than one angle. Not every flaw is obvious at arm’s length, and visual inspection alone may miss a problem.
Tips: Keep tools clean and sharp, and check measuring tools against a known reference. Secure the piece before cutting or setting. If a tool feels awkward, pause and reassess your grip; experience helps, but habits can still need correction.
What Is Jewelry Equipment Used For?
Jewelry equipment supports each step from planning a piece to checking its finish. The bars count representative equipment examples shown for each stage—not market statistics. Design tools help plan dimensions and form; fabrication tools shape and join materials; setting tools secure gemstones; inspection tools help check measurements, surfaces, and details.
How Bench Tools Shape Metal and Wire into Jewelry Components
Bench tools turn flat sheet and straight wire into parts that can be assembled, adjusted, and worn. A bench pin supports the work while a jeweler’s saw cuts outlines or narrow strips. Pliers bend wire into hooks and loops; a steel mandrel helps form consistent rings and curves. Small hammers flatten, texture, or gently shape metal. Files smooth edges, while drawplates reduce wire thickness in controlled steps. The work is tactile. You can feel resistance change as metal bends, and hear a file catch on a rough edge.
The scale is substantial. The Silver Institute’s World Silver Survey 2024 reported global silver jewelry fabrication of 203.1 million ounces in 2023, up 5% from the previous year. The World Gold Council’s Gold Demand Trends: Full Year 2023 reported 2,093 tonnes of global gold jewelry demand. These figures describe material demand, not bench-tool sales, but they show why reliable forming and finishing matter. Good tools help repeat a dimension; they cannot replace careful measurement or skilled hands. A hand-formed curve may remain a little uneven. Sometimes that is character; sometimes it needs another pass with the file.
How Casting Equipment Works with Gold Near Its 1,064°C Melting Point
Gold casting equipment must manage heat carefully, because pure gold melts at about 1,064°C. Jewelry alloys can melt at different temperatures, so the metal’s composition matters. A furnace heats gold inside a suitable crucible, while a temperature sensor helps the caster judge when it is ready. Small differences matter.
Before pouring, the investment mold is heated to drive off moisture and reduce thermal shock. The caster positions the mold securely, then transfers molten metal using a controlled pouring or casting system. Centrifugal and vacuum-assisted machines move metal into fine cavities in different ways. The goal is a complete fill, not simply a fast pour. Not every pour behaves.
In practice, readings are useful but not perfect. A sensor may lag behind the metal, and a mold that is too cool can leave incomplete details. Excessive heat or holding time can also affect the alloy and increase oxidation. Experienced casters inspect the surface, check equipment, and adjust the process for each piece. Even then, results need review. A sprue, a small test casting, or a rough edge can reveal where the next adjustment belongs. Safety gear and heat-resistant tools are essential around molten metal.
How Assay Tools Check Gold Against ISO 9202 Fineness Grades such as 375‰ and 750‰
Jewelry equipment helps an assayer determine whether a gold alloy matches its stated fineness. Under ISO 9202, 375‰ means 375 parts gold per thousand, while 750‰ means 750 parts. The difference affects both value and the metal’s working properties. Small differences matter.
A careful check often begins with a clean, representative sample. A calibrated balance records its mass, while X-ray fluorescence equipment can estimate surface composition without cutting the piece. That reading is useful, but it may not reflect the interior if the item is plated or unevenly alloyed. A touchstone and test solutions can offer a quick comparison, though results depend on technique and are not a precise bulk measurement. For stronger confirmation, a laboratory may use a validated fire-assay method on a prepared sample. That process is destructive. In practice, no single tool answers every question; the method should suit the item and the certainty required. Even experienced operators can overlook contamination or poor sampling. Rechecking the sample is worthwhile.
How Gemological Tools Assess Diamonds on GIA’s D–Z Color Scale
Gemological tools help assess a diamond’s body color, not just its sparkle. On the D–Z scale, D represents the colorless end, while grades farther along the scale show increasing warmth, commonly yellow or brown. The differences can be subtle. A single step may be hard to spot without a controlled comparison.
For grading, a trained observer examines the diamond face-down under consistent, neutral lighting. Precisely graded comparison stones, often called master stones, help anchor the judgment. Tweezers hold the diamond by its edges, while a clean, neutral surface reduces visual distractions. A loupe can reveal inclusions, but it does not determine color by itself. Small details matter.
In practice, mounting, reflections, and surrounding colors can affect what the eye sees. Color-measuring instruments may offer useful readings, yet they do not replace careful visual comparison. Even experienced observers can disagree near a boundary. That is worth remembering: equipment supports a judgment, but it does not make every borderline call perfectly certain.
What Is Jewelry Equipment Used For? - How Gemological Tools Assess Diamonds on GIA’s D–Z Color Scale
| Equipment or tool | What it is used for | Role in D–Z color assessment | Important limitation |
| Controlled viewing light | Provides consistent illumination for observing a diamond’s body color. | Helps graders compare diamonds under repeatable, neutral viewing conditions and reduces color shifts caused by surrounding light. | Warm household bulbs, colored walls, and mixed lighting can influence visual judgments. |
| Color master stones | Provide reference diamonds with established color grades for comparison. | Help place a colorless-to-light-colored diamond within the D–Z scale by comparing its apparent color with reference grades. | Comparison depends on suitable references, controlled conditions, and trained visual judgment. |
| Diamond grading tray or neutral background | Holds stones securely and limits distracting colors in the viewing area. | Supports consistent face-down comparison, a common approach for evaluating body color while minimizing reflections from the setting. | A mounted diamond can be harder to grade accurately because metal and setting reflections may affect its appearance. |
| Gem tweezers | Allow a loose diamond to be handled and repositioned without touching its viewing surfaces. | Make it easier to orient a stone consistently for side-by-side color comparisons. | Tweezers help with handling but do not measure or determine a color grade. |
| 10× loupe | Magnifies details such as inclusions, facet edges, and surface features. | Can help examine a diamond’s condition and identify features that might interfere with observation; it is not the primary tool for assigning D–Z color. | Magnification alone does not provide a reliable color grade. |
| Gemological microscope | Provides magnified views of a diamond’s internal and surface characteristics. | Useful for examination and documentation, while color assessment remains a separate visual comparison task. | Microscope lighting and magnification can change appearance, so they should not replace controlled color-grading conditions. |
| Spectrometer or color-measuring instrument | Measures aspects of light absorbed or transmitted by a material and can produce numerical color data. | May support analysis or research by adding objective measurements alongside expert evaluation. | Instrument readings depend on the device, calibration, stone characteristics, and measurement setup; they do not automatically equal a standard D–Z grade. |
| Color-grade record sheet or digital log | Records observations, comparisons, and assessment details. | Helps maintain a traceable record of the estimated grade and the conditions or references used. | Documentation supports the process but does not replace examination by a qualified grader. |
The D–Z scale describes the progression from colorless to progressively more noticeable color. A color grade is determined through careful comparison under controlled conditions; tools support consistency but do not all measure color directly.