How to Install Curb Pavers
A well-built curb can make a driveway, garden path, or planting bed look crisp and intentional. But the visible stone is only part of the job. Beneath it, a firm, evenly compacted base helps limit shifting, while careful grading directs water away from nearby surfaces. A Curb Paver installation rewards patience: a few extra minutes with a level can prevent a wavy edge that catches the eye every day.
Hardscape professional Joe Raboine is a relevant industry voice, but I can’t verify a direct quotation from him on curb-paver installation. Rather than invent one, this guide follows a practical principle: prepare the base carefully, keep the line true, and check drainage as you work. Small details matter. A taut string line, a rubber mallet, and a straightedge can help keep each paver aligned. The right tools do not replace good judgment, though; soil conditions and product instructions can change what the project needs.
The steps ahead cover planning, excavation, base preparation, setting the pavers, and finishing the joints. Expect some adjustment. Even a carefully placed stone may need to be lifted and reset. That is normal. With clear measurements and steady checks, you can build a durable border that looks neat and performs well through changing weather.
Plan the Curb Layout and Measure the Installation Area
Before setting curb pavers, walk the proposed line and note where it meets paths, driveways, and planting beds. A garden hose works well for shaping gentle curves; adjust it until the edge looks natural from several viewpoints. Mark the line with stakes and string for straight sections, or landscape marking paint for curves. Keep the planned curb clear of tree roots, downspouts, and obvious utility features. Check drainage, too. Water should not be trapped against a building or sent toward a neighbor’s property. Small changes now save awkward cuts later.
Measure the full marked length, including separate straight and curved sections. For curves, follow the center of the planned curb rather than measuring only the inside edge. Divide each section by the paver’s usable length, allowing for joint spacing; use the actual dimensions of the units you intend to install. Measure the desired curb width and height as well, since these affect excavation and the compacted base. Add a modest allowance for cuts and damaged pieces, especially on tight curves. I tend to measure twice, but I still find one mark that needs moving. That is normal. Recheck the layout after marking, then record each section’s measurements before ordering materials.
Gather Materials and Prepare a Stable Base
Before setting curb pavers, mark the curve with a hose and check it from several angles. Excavate beyond the finished edge so the base supports both the pavers and their restraint. Remove roots, loose topsoil, and soft pockets; a shovel can reveal weak spots that look firm from above. Keep the trench floor even, then compact it in thin lifts. A hand tamper works for short runs, but a mechanical plate compactor gives more consistent results.
Use crushed, angular aggregate rather than rounded gravel, which can shift under load. The Concrete Masonry & Hardscapes Association’s residential installation guidance specifies a consistent 1-inch bedding layer over a compacted aggregate base; base depth should reflect soil, climate, and expected traffic. For many light-duty installations, 4 to 6 inches of compacted base is a practical starting point, not a universal rule. Check local specifications where frost or vehicle loads are concerns.
Keep the bedding sand screeded and undisturbed. It is easy to overwork it. Before placing pavers, confirm the base slopes away from structures and has no soft or visibly uneven areas. A level helps, but water test is useful too: a small pour can reveal low spots before they become permanent.
Place and Align the Curb Pavers
Set a taut mason’s line along the planned curb edge, then dry-lay several pavers to check the curve and joint spacing. A string line reveals small bends that are hard to spot from above. Keep joints even. The Concrete Masonry & Hardscapes Association’s Tech Spec 2 describes a typical screeded bedding-sand layer of about 25 mm (1 in) for interlocking concrete pavers, over a properly prepared, compacted base. Follow the project design and local specifications if they call for different materials or dimensions.
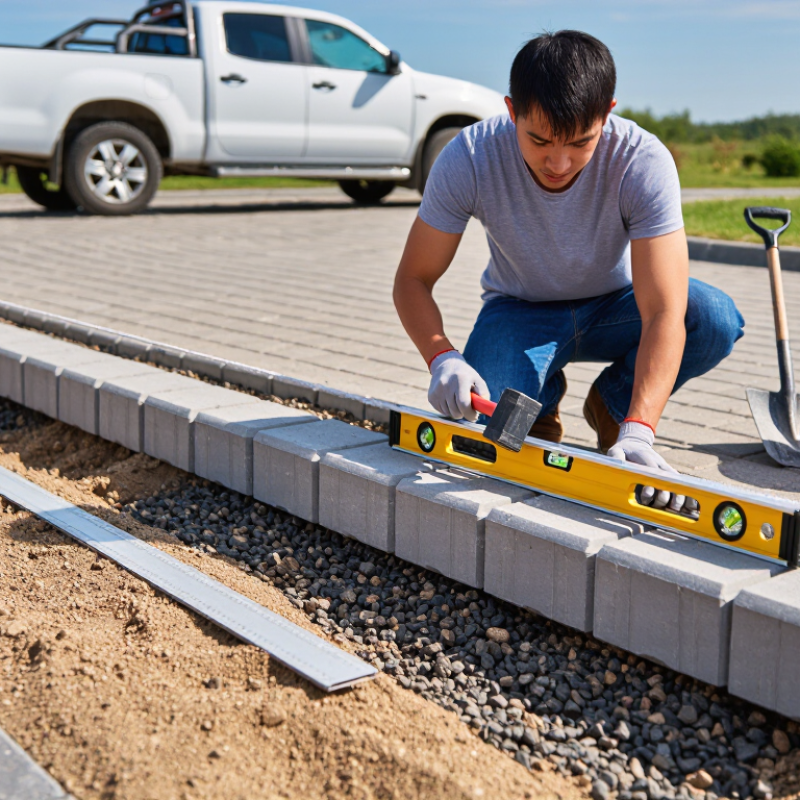
Place each curb paver gently onto the bedding layer; do not drag it, because dragging can shift the sand and disturb the line. Tap it into position with a rubber mallet, checking its height and face alignment against neighboring units. Use a level or straightedge often, and correct low spots by lifting the paver and adjusting the bedding—not by pounding harder. Small corrections matter. A slight wobble may seem harmless, but it can create uneven joints and collect water. Check the alignment from both ends of the run, too; one view can hide a gradual drift. The process is a little repetitive, and it is easy to rush near the final pavers. Take another look before locking the edge restraint in place.
Secure the Pavers and Finish the Joints
Once the curb pavers are aligned, secure them before filling the joints. The bedding must be firm, not soft; a paver that rocks can loosen nearby pieces. Brush dust from contact faces, then apply an exterior-rated masonry adhesive or mortar specified for the pavers and base material. Avoid guessing here. Different products require different application methods and curing times. Press each unit into place, keeping the top edges even with a straightedge and checking the curve from several steps away. A dry fit can reveal gaps that are difficult to hide later. Wipe away excess material promptly without shifting the pavers.
After the bond has set as directed, fill the joints with material suited to the installation, such as jointing sand or mortar. Work it into narrow spaces with a pointing tool, and keep the paver faces clean; dried residue can leave pale marks. For sand, sweep diagonally across the joints, compact gently, and refill low spots. For mortar, tool the joints evenly and avoid smearing the surface. Check that water can drain away instead of pooling against the curb. Cover the work if rain threatens, and keep foot traffic off until the stated curing period ends. A small gap may seem harmless, but it can collect water and debris.
How to Install Curb Pavers: Secure the Pavers and Finish the Joints
Follow the steps in order: secure the pavers with an edge restraint, sweep joint material into the gaps, compact the pavers, then finish and activate the joints according to the material manufacturer’s instructions.
Inspect the Installation and Address Common Issues
Inspect the curb line after compaction and again after the first heavy rain. Look for rocking units, open joints, chipped corners, and water sitting against the curb. A taut string can reveal dips that are hard to spot from above. Check that the curb follows a steady line and that runoff has a clear path away from buildings. Small deviations matter.
Use published specifications to guide repairs, not guesswork. The Concrete Masonry and Hardscapes Association’s Tech Spec 2 calls for a 1-inch bedding-sand layer for typical interlocking concrete pavement. A thicker or uneven layer can contribute to settlement, so lift affected pavers and correct the base rather than adding sand on top. ASTM C936/C936M sets an average compressive-strength benchmark of 8,000 psi for concrete paving units. That figure concerns the units, not the quality of the installation.
For rocking pavers, check whether the aggregate base is loose or the edge restraint has shifted. Recompact the base, reset the units, and refill joints with suitable jointing sand. If water ponds, inspect the slope and correct low spots; simply sealing joints will not fix poor drainage. Take photos before and after repairs. I’d still recheck the line a week later. It is easy to miss a subtle dip on installation day.