






Automotive wiring rarely draws attention until a connector loosens, corrodes, or interrupts a circuit. A failed terminal can disable a sensor, lighting circuit, or power connection. Choosing the right Harness Connector is therefore more than a fitment decision; it affects reliability, serviceability, and safety.
The International Energy Agency reported in Global EV Outlook 2024 that nearly 14 million electric cars were sold worldwide in 2023, about 18% of total car sales. That shift brings more high-voltage components and increasingly complex electrical systems, though not every connector faces the same demands. IEA Executive Director Fatih Birol described the wider transition: “The new era of electric car manufacturing is a global phenomenon, and it is also a sign of the rapid pace of change in the sector.” His observation underscores why connector selection deserves careful attention as vehicle architectures evolve.
In practice, inspect the details: terminal material, wire-gauge range, seal design, current rating, and locking mechanism. A connector that clicks firmly on a dry workbench may behave differently beside a hot engine, under vibration, or in road spray. Small details matter.
This guide compares ten automotive harness connectors by application, durability, and installation needs. It also considers the trade-offs that product listings can gloss over, including tool requirements and replacement-terminal availability. No single connector suits every vehicle. Confirm the vehicle’s wiring specification before choosing; that step is easy to skip, and it can prevent an expensive mismatch.
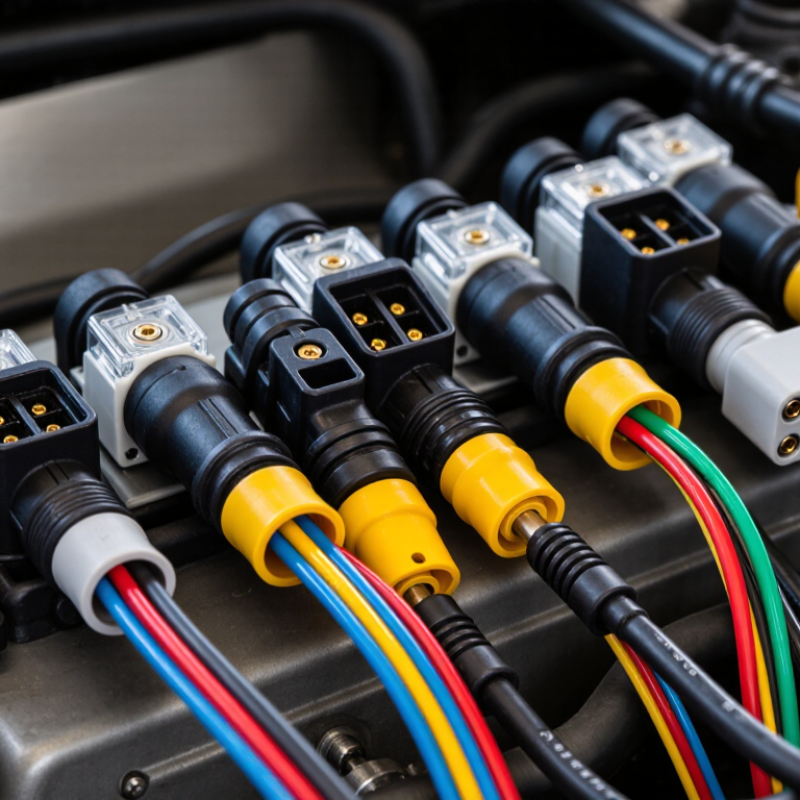
Automotive harness connectors join separate wiring circuits while keeping current paths organized and protected. They appear near sensors, lamps, control units, and other components exposed to vibration or heat. A sound connection helps limit resistance, intermittent signals, and corrosion. Small details matter.
Most connectors include metal terminals and an insulating housing. Terminals carry current; the housing holds them in position and prevents contact between circuits. Seals help keep out water, dust, and road salt.
A secondary lock can stop terminals from backing out during vibration. Some designs also use a position-assurance clip. Not every connector needs one.
Choosing a connector means matching its current rating, wire size, pin count, and operating environment. A mismatch can cause overheating or a poor fit, even when the parts look similar. Check that each terminal is fully seated and that the seal is not folded or cut. A gentle pull can reveal a weak crimp. But it is not a full electrical test.
I sometimes find that a clean exterior creates false confidence; moisture may already have reached a hidden contact. Disconnect and inspect carefully when a circuit behaves intermittently.

A harness connector should be judged by more than its shape or pin count. Start with the vehicle’s wiring diagram and the connector’s technical data. Check the circuit’s current, voltage, wire gauge, and terminal arrangement. A mismatch can cause heat, intermittent signals, or difficult repairs. Fit matters.
Next, consider the conditions around the connector. Engine-bay wiring may face heat, vibration, moisture, and oil. Look for suitable sealing features, secure terminal retention, and housing materials rated for the expected environment. A connector that clicks into place should stay locked when the harness moves, but forcing the latch is not a reliable test. Inspect the seal and terminals for damage, then confirm that each wire is supported rather than sharply bent at the rear.
Ease of service deserves attention too. Clear cavity markings and accessible release tabs can reduce mistakes during installation or repair. Compare the connector with the vehicle’s service information; similar-looking housings may use different terminals. I would not treat a tight fit as proof of compatibility. That assumption is easy to make, and sometimes wrong. Even careful checks have limits, so verify the pinout and specifications before connecting a circuit.
Automotive wiring needs connectors suited to current, vibration, moisture, and service access. Sealed multi-pin connectors keep water and grit away from grouped circuits, while unsealed multi-pin types fit protected cabin locations. Blade connectors offer quick, flat contact; bullet connectors suit simple inline joins. Ring-terminal connectors fasten securely to studs, and spade terminals allow easier removal during repairs. Small choices matter.
Coaxial connectors carry antenna signals with shielding, while twisted-pair data connectors help limit electrical noise on vehicle networks. High-voltage interlock connectors combine power connections with a safety-monitoring circuit; their voltage and current ratings must match the system. Fiber-optic connectors carry light-based data where electromagnetic interference is a concern. The IEA’s Global EV Outlook 2025 reports that electric-car sales exceeded 17 million in 2024, making high-voltage and data connections increasingly relevant. Still, that trend does not make every vehicle an EV. Check wire gauge, terminal fit, sealing, and temperature range against the actual application; a connector that clicks into place may still be a poor electrical match.
Compare representative contact-position counts across common automotive connector types. Counts describe the listed configuration, not connector quality or a universal limit for each connector family.
Sealed inline connectors are available in many layouts; the 2-way and 3-way examples show common configurations. Some standardized connectors may have positions that are not populated in every application.
Choosing among the 10 best harness connectors starts with the vehicle environment, not the catalog photo. Sealed nylon housings resist heat and many common fluids; glass-filled polymers add stiffness but can complicate tight routing. Tin-plated copper terminals suit many everyday circuits, while silver or gold finishes may be specified for particular current, corrosion, or low-voltage needs. Check the terminal’s published current rating at the expected wire size and temperature. A rating without test conditions is incomplete.
Sealing claims need context. Under IEC 60529, IP67 indicates dust-tight protection and temporary immersion at one metre for up to 30 minutes. That does not prove resistance to road salt, engine fluids, or years of vibration. USCAR-2, an automotive connector performance specification, includes tests such as temperature cycling, vibration, and fluid exposure. Compare the tested connector configuration with your actual use. A cap or seal can be misassembled. Small detail, big consequence.
For an engine-bay harness, inspect seal material, cavity plugs, terminal retention, and strain relief together. For a cabin circuit, compact size and serviceability may matter more than immersion protection. Ask for derating curves and test reports, not just a headline amperage or IP code. I would still verify fit on the real harness; paper specifications can miss awkward bends and latch access. A careful bench check helps.
A connector should match the circuit, not just the shape of the old plug. Check the wiring diagram for circuit function, nominal voltage, and fuse rating. Then confirm the connector’s rated current, terminal size, and wire-gauge range. The fuse protects the circuit; it does not make an undersized terminal safe. A loose terminal can heat up under load, even when the connector housing looks intact. Fit matters. So does the crimp.
The International Energy Agency’s Global EV Outlook 2024 reported nearly 14 million electric-car sales in 2023, around 18% of global car sales. That growth makes it especially important to distinguish low-voltage accessories from high-voltage systems. Use connectors rated for the circuit’s voltage, current, temperature, and exposure to water or road spray. Check for a positive locking mechanism and seals where the harness faces the weather. For repairs, match terminal material and plating, too; similar-looking contacts may not mate reliably. A useful cross-check is the vehicle service information and the connector manufacturer’s rating, not appearance alone. I would still pause over borderline current ratings: real heat, vibration, and aging are hard to judge from a bench test.
| Connector Configuration | Typical Circuit Use | How to Match It | Environmental Considerations | Common Mismatch to Avoid |
|---|---|---|---|---|
| Sealed 1-cavity connector | Single-wire circuits, such as some switches, grounds, or auxiliary connections | Check terminal style, wire range, locking method, and whether the circuit needs a dedicated return wire. | Choose a sealed design where splash, dirt, or moisture is expected. | Assuming one cavity means the connector can carry any current; terminal and wire ratings still apply. |
| Sealed 2-cavity connector | Two-wire sensors, small actuators, and simple power-and-return circuits | Match cavity count, terminal size, wire gauge, circuit polarity, and the vehicle-side mating half. | Useful in exposed areas when the seal and temperature range suit the installation. | Using an unsealed counterpart in a wet or dirty location. |
| Sealed 3-cavity connector | Many three-wire sensors using supply, signal, and ground connections | Confirm the pinout from the vehicle wiring diagram; cavity positions are not universally assigned. | Check seal compatibility with the wire insulation diameter and connector housing. | Matching only the number of wires while overlooking pin assignment or sensor voltage. |
| Sealed 4-cavity connector | Compact sensor, ignition, or small lighting assemblies with multiple circuits | Verify terminal gender, keying, pinout, wire range, and any circuit-specific current requirements. | Use an appropriate seal and temperature-rated materials near the engine or exterior. | Forcing a similar-looking connector with different keying or terminal layout. |
| Unsealed 2-cavity connector | Low-current interior circuits in protected locations, such as some switches or trim components | Confirm the connector is intended for the location and that its terminals suit the wire gauge. | Best suited to dry, protected areas away from road spray and condensation. | Installing an unsealed connector in an exposed engine-bay or underbody location. |
| Sealed 6-cavity connector | Multi-circuit lighting, body, or sensor harness branches | Compare the full pinout, populated cavities, terminal sizes, and available space for the wire bundle. | Consider vibration, water exposure, and strain relief at the harness entry. | Leaving unused cavities without the specified cavity plugs in a sealed housing. |
| Sealed 8-cavity connector | Door, body, and accessory harness connections with several low- or moderate-current circuits | Check cavity numbering, terminal retention, wire routing, and whether circuits share a common ground. | For doors, account for repeated movement and protect the harness from chafing. | Ignoring flex and abrasion where the harness passes through a moving panel. |
| Sealed 12-cavity connector | Higher-density body or engine-harness branches carrying multiple separate signals and feeds | Use the correct cavity map and terminal families; confirm each circuit’s wire and terminal requirements individually. | Match the housing, seals, and materials to the local temperature and moisture conditions. | Treating every cavity as interchangeable when terminal sizes or circuit functions differ. |
| 2-cavity high-current connector | Higher-load components such as some fans, pumps, or auxiliary power devices | Size terminals and wire for the circuit load, run length, ambient temperature, and overcurrent protection. | Check heat exposure, vibration resistance, and whether the connection needs environmental sealing. | Choosing by cavity count alone; a small two-way connector may not be suitable for a high-load circuit. |
| Inline multi-cavity harness connector | Joining a removable component harness to a vehicle wiring branch | Match housing keying, terminal family, pinout, wire ranges, and service access requirements. | Secure the harness to limit vibration and prevent tension on the terminals. | Mixing connector halves that appear compatible but use different terminals or retention features. |
Selection note: These are general connector configurations, not universal ratings. Verify terminal, wire, voltage, current, temperature, sealing, and pinout specifications against the connector documentation and the vehicle wiring diagram before installation.

